By now your files should have finished uploading from our previous tutorial how to install WordPress manually using FTP, and you have logged into Cpanel so I can show you how to create a WordPress database manually.
Whether you’re using Cpanel, or whether you’re using Plesk, or any other type of web hosting panel; the key here is to create a MySQL database and username and password.
How To Create A WordPress Database Manually
I am using Cpanel in this tutorial so what you need to do is log-in to Cpanel and scroll down and find where it says “MySQL Database Wizard”, it will be under the Database Tab.
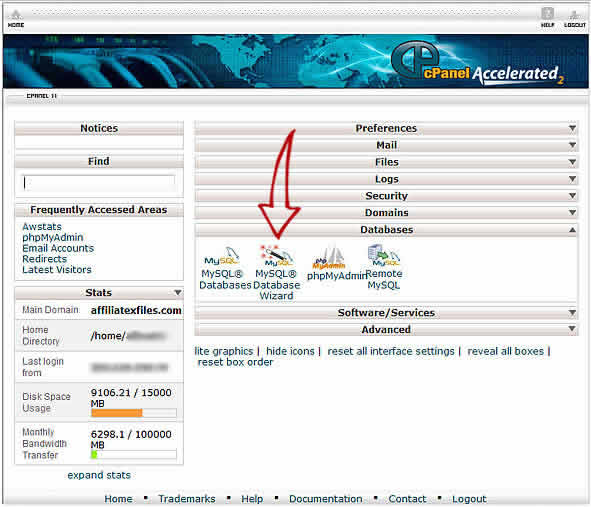
Again, if you’re using Plesk or any other type of web hosting panel, you should see something that says “Create MySQL Database” and if you don’t – you can always contact your web hosting company to find out the steps to create one or have them do it for you.
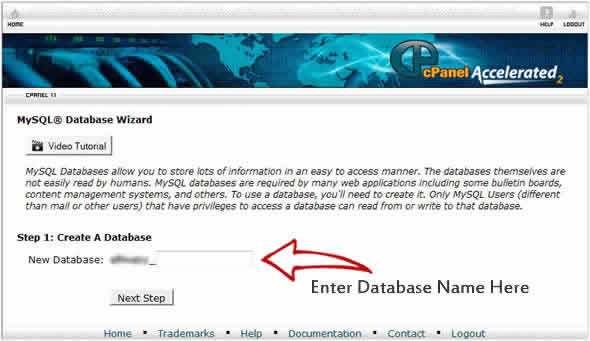
In the screenshot above I will enter “member” as the database name as this will help me later to remember which database is associated with each site. Click on next step.
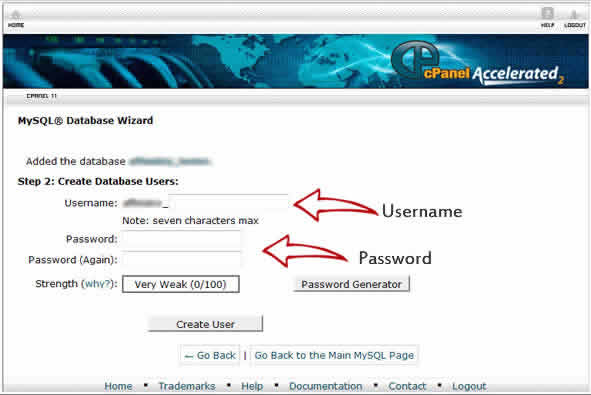
We’ll generate a password and make sure you save that password is somewhere safe. The next step is to click on Create user and make sure that you keep this information straight away.
Click on “All Privileges” Click on next step and there we go.
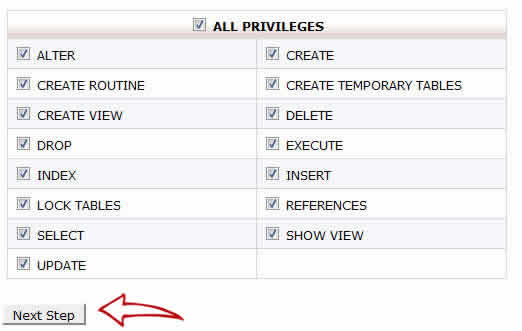
Remember you need to make a note of all the database details. You can do this by copying everything over to notepad, the database name, username and password.
Close Cpanel and head back to Filezilla.
Now what you need to do is go back to your computer where the WordPress files are located, and locate the wp-config-sample.php file in the extracted folder.
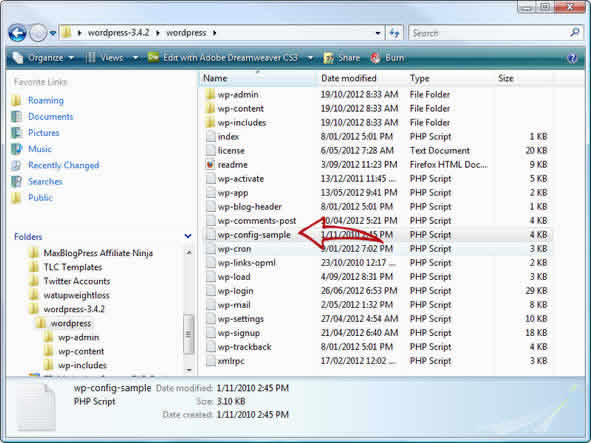
Rename this file to wp-config.php
Next, Right-click and open the config.php file using Notepad. And if you’re using Macintosh – just open this up with your default text editor.
What we want to do is take the three pieces of information that we created earlier: the Database, the Database Username and Password, and replace this information in the newly created config.php file.
OK, now replace the text between these single quotes with the information in the wp-config.php file.
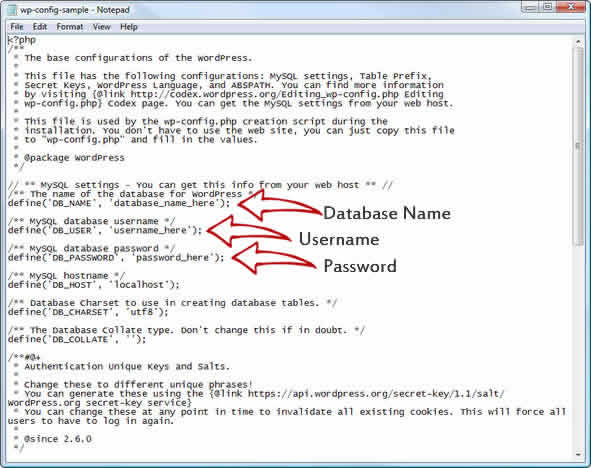
Then you just save and exit.
Now, copy this new file (wp-config.php) over to your website using FileZilla, to the same place where you uploaded your WordPress files.
Once that’s done, let’s get your WordPress site installed, open your web browser, go to the location where you installed the files -> www.YourDomain.com or www.YourDomain.com/subdirectory – this is where the WordPress files are located.
If everything went to plan you should be presented with a welcome screen in the example below.
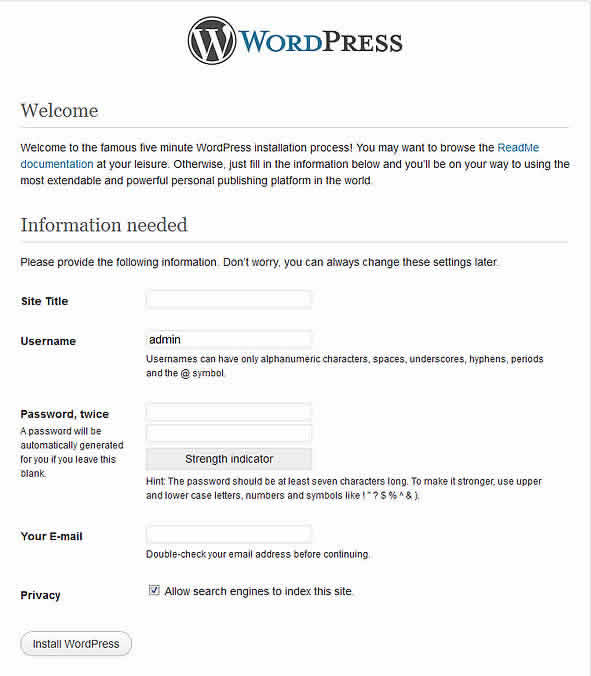
Enter your site title, and we’re gonna call this “Affiliate X Files Members”. Enter your administrative username and password. Enter your e-mail.
Make sure the box above the WordPress install button is checked, or your site will be blocked from being found by the search engines. So in other words, once you’ve installed your WordPress site if this is checked, it will notify Google that your site is up.
However, you might consider leaving it unchecked at the start until you have time to place some relevant content for the search engines to index. If you leave it unchecked, you will have to remember to change this later in your Dashboard once you have some content posted.

Click Install WordPress, and it’s done! Now you’re ready to log-in and start posting.
Congratulations you have just discovered how to create a WordPress database manually, you have just installed WordPress 3.4.2 version!

Leave a Reply